Saturday, May 30, 2015

When It Comes to Materials, Part Three

Hey, guys!!  I apologize for not updating this as faithfully as I'd hoped. Most days around here are just really busy and hard to find time to sit down and write something out, let alone type it out as well.  Many thanks again to my friend Robyn for hosting the last blog session!!  I hope you checked her art out and enjoyed her post!!   =-) 

In this final session (well... I'll say final for now. I may one day do a post about some of the different paper types I've used over the years, but I have other things I'd like to focus on after this post), I'm talking about the tools that add color to your work to make it more vibrant! 

There are so many different mediums and combinations out there that can make for a beautiful colored picture. Figure out what's going to work best for you, and then try different media combinations to add new textures and depths of color to your work! 


-Colored Pencils-  This is probably the most popular media choice for coloring. And why not? Colored pencils are affordable and come in every shade imaginable!! I started coloring with colored pencil very sloppily at first, but as I read books on the subject and watched other artists, I slowly learned some technique for improving with this medium. Pencils are still my favorite choice for coloring.. I just love the feel of it in my hand, and there's nothing better than the smell of a freshly sharpened colored pencil (only to be rivaled by the smell of a brand new book)! It's fun to learn how to blend, layer, and add more colors as you progress in your work! 


- Crayola Colored Pencils-  This is what I started out with. We were a homeschool family growing up, so we had plenty of colored pencils around!!  

I see a lot of artists that still use these in their manga art. They're affordable, and you can pick them up in just about any store, and I've seen gas stations that sell the small packs!! Of course, your basic set comes with eight primary colors, but there are sets of 12, 24, 36, and 50 that offer a bigger spectrum of color to play with and add to your collection of pencils quite nicely. These colors go down very well on most papers, and blend fairly well. My only complaint would be, that I've had several of these pencils that break and split when being sharpened, and it seems like it's an issue with certain colors... purple is one example. I'm not really sure why that is!  But, it hasn't been a big issue, and I have kept on buying them as needed.  I highly recommend these as a nice starter colored pencil!!


-Prismacolor Colored Pencils-   These are the pencils that I really thought would improve my coloring skills. I looked into them and watched other artists using them and really wanted to try them for myself. And, they did improve my art, but first I had to learn how to work with them. They are different from Crayolas, and going from a cheaper material to a nicer quality one is different. I also had to save up for these, since they are pricey.  I'm going to talk about three different brands of this pencil that I used.

The first set that I bought at our local Staples was the Prismacolor Verithin. I didn't realize until after I got them home and opened them up that these pencils had a thinner lead. I was disappointed, but I kept them because I had earned the money to buy them and decided I could still play around with them. I quickly discovered that the thinner lead was NOT ideal for coloring large areas, which was mostly what I was doing at the time... But they are great for doing detail work in a drawing! You learn as you go along!!  Mine have worn down now to nubbins, and I still have them... er.. what's left of them.. in my pencil box! The set that I bought was a set of 10, and it had your basic colors.

Our WalMart then started carrying some different pencils from the Crayola that I was buying... These were put out by Prismacolor, and they were called "Scholar" pencils. I eagerly bought a set of these, because these were more the pencil that I had been wanting. The scholar set at our WalMart was a set of 12, and it added to my collection nicely. I started playing with these and liked the softer lead, because it was so much easier to blend! They also sharpened quite nicely, but I quickly discovered that I liked sharpening the pencil often to keep a sharp point when I was coloring. This is the set I would recommend as a "step up" from Crayola. And you can play with the Crayola pencils and Prismacolors together, they will blend. Most of the time though, your Prismacolor's are going to be a lot more vibrant than the Crayola pencils!

Since I really,  really  like these pencils, I discovered that a Michael's store about 45 minutes away sells them individually, and so I go up there every so often to replace colors I've worn down, or to add some new colors to my collection. They are about $2 a pencil when you buy them as a single, but since the sets of these pencils are really expensive, I decided that I prefer to buy them this way, so I can pick and swap the colors the colors that I really want. The Prismacolor Premier pencils are very soft leaded and throw off brilliant colors!  I love how easy these are to blend, which is a bonus when you want to layer colors and shades. They also make a "Colorless Blender" pencil, which I only learned about a year ago. It's a really cool colorless pencil that is specifically for blending colors together for  smoother look. You can sharpen in, and I prefer to wipe mine off after blending colors so that I don't double blend next time.

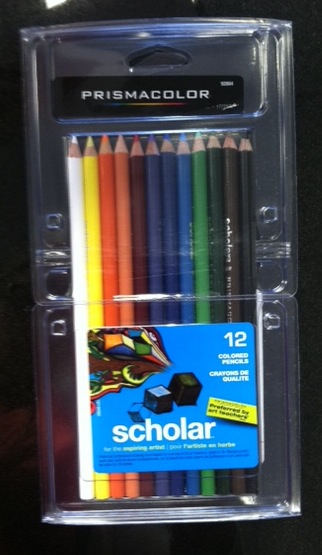
Overall, these pencils are really worth looking into and saving up for if you're a color enthusiast like myself and are looking to improve in your coloring skills!!  They also make sets specifically for manga coloring. You can always watch some tutorials on youtube if you are interested in learning more about these pencils and how you can best use them!!


- Crayola Crayons -  Yes. I admit it... I still color with crayons!!  And not just because I have a four year old.  =-)


I mostly use these when I have a lot of background color to do, such as a sky, or dirt on the ground. I like blending colors for sunsets and such as well. Of course, you really don't need to be told that you can buy Crayola crayons everywhere.  And, let's just admit it.. When it comes to crayons, Crayola is the best out there for quality (at least in my book, but I'm open to new brands).

What I love best is that they started coming out with sets of eight in various color schemes. I scarfed up a bunch of these when our WalMart had them out with the new school supplies, and I'm still using them! I stocked up on the blues and browns, since I go through those the fastest. But they also do fun color sets as pictured, and I even have a set that is "Zombie" themed. It's nice to be able to just grab a set of these with the colors all laid out and ready to go!


-Markers-

This next part will be focused on markers. In my genre of art, which is the manga, it seems that markers are what we all want to work up to. However, they are EXPENSIVE. And, you get addicted QUICK to how nice they are and how much faster it is to color your work!!  xD  I'd had my eye on Copic Markers for a long time, and I was saving up towards those as my ultimate goal, but I also tried out a few other brands along the way that I'll talk about!


-Prismacolor Scholar Markers-  Our WalMart started carrying these not long after they started to carry some of the other "Scholar" supplies by Prismacolor. Since I liked they pencils and wanted to work my way to using markers, I bought a pack and was excited to play with them.

These markers came in two different sets; one with a brush tip, and the other set with a wider tip. The set I bought are the wider nibbed. The quality is OK, but I'm still not as crazy about them as I thought  I would be. The quality is just a small step up from Crayola markers, in my opinion. I've mostly used them for adding some detail shade to pictures, or little dots or basic things like that to a drawing, because the quality isn't that impressive. They blot really easily too, which is always a bummer!   =-/   Still, I have my first set in my marker box, because they were the first set of "artistic markers" that I purchased. I just can't highly recommend them.


-Copic Markers-  Copic Markers were my ultimate goal. I set a time goal for myself, because a., they are VERY expensive, and b., I wanted to really get better with colored pencils before I bought these. So I improved my colored pencil skills for a year and started saving up for some Copics. I think I bought six of them at first, and I had already determined what colors I wanted ahead of time. I felt like a real manga artist when I walked out of Michael's with those six markers!!!  It's an awesome feeling, accomplishing an artistic goal like that!!! 

Copic Sketch were the first markers that I bought, because that was what Michael's carried.

A few months ago, a friend blessed me by surprising me with a set of 72 Copic Ciao markers. I had always wondered if there was any distinct difference between the Sketch Markers and the Ciao, but after using both, I think it's just a matter of preference and what feels best in your hand. The ink flow is about the same in both marker types.

I had watched a lot of tutorials on youtube about these markers, and watched people using them (drooling the whole time) and I wondered if the quality really was as great as it looked. Now that I've had them myself and use them pretty much all the time, I can say yes, they are EXCELLENT quality, above and beyond what I had ever expected them to be.  You can buy them in singles, or in sets.

It does take a bit of work to learn how to use them. Coming from pencil to marker is a jump, because a lot more color comes out of a marker!!! But markers, especially these ones, give such a degree of quality to your work if you really want to learn to use them correctly. If it's something you're interested in, make it a goal to save up for some... I started with six and kept adding different colors to my collection of Sketch, and now I have the Ciao set that I have started replacing and adding colors to as well. They are pricey, so you'll want to save up for these!!! I just replaced a few of my Ciao that were starting to wear down, and I ordered directly from Copic's website. The difference in price was great, compared to Michael's and Amazon, and they have a color palette you can order from on their site so you know exactly what you are getting in colors!!!


-Prismacolor Premier Markers-  I bought one or two of these when I bought my first six Copics. The price for these as singles is about a dollar cheaper at Michael's.

These are SOOO much better than the Prismacolor Scholars that I talked about. They have a tip on each end, like the Copics. I prefer to buy the markers that have a brush tip and a fine tip (as pictured here), but I have also accidentally bought a few that are chisel tipped and fine tipped. The chisel tip is better for larger coloring areas.

Overall, I like these markers too, but Copics are still at the top in my book. I have a few of these and I add more every now and then. The colors vary a bit from what Copic has, so you can add some variety. I also feel like the ink flows out of these a bit differently from the Copic markers, but it's not a big deal and they are still very comfortable to use!!!  You can buy these in singles at Michael's and online too, and they also come in large sets.


-Spectrum Noir-  I only recently discovered these markers at our Joann Fabrics. A set of six is $15, so I got a couple sets and started to play around with them.
It's nice that these come in colored palette sets. However, I'm not happy with the ink flow. It seems to come out reeaally fast and bleeds fast into the paper, so you have to stay a reasonable distance away from the lines you are coloring in. If I'm in a marker bind, I'll pick up a new set, since they are close by where I live and fairly priced. I have three or four sets of these now in various palettes. One of the sets I bought though dried out really fast and I only used them a couple times, but it may have been sitting in the store awhile.. I really don't know. Anyway, they are cheaper markers and you can play with them, but I'm not overly impressed. I also think they tend to streak easier.


This sums up my thoughts on coloring mediums. I hope I've been a help in this area, or given you some new ideas and goals to work up too!!!  Again, don't think that just getting a new art tool is going to automatically make your work better. It's not magic, and it doesn't work like that; it works when you apply yourself to get better, and want to improve. You'll go through a lot of bad tries before you start getting results worth showing off.. I know this from experience!!! Save some of your first results, keep practicing, and then go back and look at those first tries and see where you have improved... this does a world of good for artists!!!  

Go forth and add some color to your world!!!   =-) 

-Stasia-Chan '15 


Tuesday, April 28, 2015

When It Comes to Supplies, Part Two: Digital Art Supplies hosted by "It's Simply Robyn"

Self Portrait Artwork by Robyn @ It's Simply Robyn
     This next session in my art supplies series is being hosted by my artist friend, Robyn.  Robyn works in digital art, and since I know nothing about the tools needed in that field, I thought it would be fun to have her write a post for this session.  Please read and enjoy, and check out her works!!!!

    Hi, I’m Robyn.  I’m an artist, like Stasia-Chan.  My art style is what I like to describe as illustrative cartooning with retro influences.  Last month Stasia-Chan asked me if I’d guest post on here about the digital tools I use to create my art.  I’m a bit of a hybrid artist myself.  I use traditional materials in my work, as well as digital tools.  I still use paper and pencils to sketch all my drawings, and from time to time use Copic markers to color my pieces, but I also like to use Photoshop, Illustrator and Sketchbook Pro to ink, layout and color my pieces as well.  For today’s post I’m going to talk about the digital tools I personally use to create art digitally.  Just like with traditional art, there are many ways to create art digitally.

       The first things I want to talk about are hardware based.  Obviously if you are going to create anything digitally be it writing, art, videos, etc you will want to have an external hard drive to backup all your files onto.  The rule of thumb is you should have your files backed up in at least 2 places in case one drive fails.  This could be 2 external hard drives, or a hard drive and a large thumb drive.  Once you have your system, the next thing is to make sure you backup your files often.  I back my computer up about 1x a month, unless my computer is acting a bit strange.  When it’s acting strange I then will do a backup immediately just in case things get worse.

Wacom Intuos Small Tablet.  Image from Amazon.ca
     The other piece of hardware that has been a lifesaver for me when creating art digitally is a Wacom Graphics Tablet.  These tablets plug into your computer via USB, and you use the included pen to draw on the tablet in different creative programs.  These are great for precise work like inking and coloring your art, where a mouse just doesn’t always do the trick.  I love using a Wacom tablet for everything I do digitally.  I use them for layout and design work, inking my sketches, and coloring them.  Some people do like to use these tablets to draw digitally as well, but I still prefer to draw my art traditionally.

       I’m a lefty so I find the pen easier to use the a mouse which I use with my right hand.  I also love that I don’t get as much fatigue in my wrist and hand as I do with a mouse.  I do also like that the nibs in the pen are replaceable, and that Wacom makes many different models at different price points.  The Intuos line starts at around $100 which is great for those starting to get into digital art.  The price slowly goes up to $250-500 for the Intuos Pro line, which has more features than the Intuos tablets and is aimed for those who are creative professionals.

       On the software side of things there are 3 programs I use when working digitally.  I use Adobe Photoshop, Adobe Illustrator and Autodesk Sketchbook Pro.  After scanning in my sketches I bring them into Illustrator to ink them.  I prefer using Illustrator because I can use the pen tool to create a vector line art.  This means that I can rescale my art at any point in the future and it won’t pixelate and degrade in quality.  Photoshop also has the pen tool, but I find it’s much easier to use in Illustrator.  Once I’ve inked the drawing in Illustrator I save the artwork as an Illustrator file (.ai) and as a Photoshop file (.psd).

Hermione bookmark illustration.
Artwork by Robyn @ It's Simply Robyn.
     I then will bring the Illustrator file into Photoshop.  Sometimes the line art isn’t jet black, so the first thing I recommend doing is adding a color overlay layer style to the line art in black, and then rasterizing the layer style.  This will color correct the line art.  I then open the template I use for my layouts and size my art inside the template.  Once that’s done I save a final version of the inked artwork as a Photoshop file (.psd) and then save the artwork as a jpeg.  From there I move onto coloring.  I prefer to color my artwork in Sketchbook Pro because it has the digital Copic Color System.  This means I can color with the makers traditionally, and use the same color system to color my artwork digitally as well.  This allows me to have a consistent look between my traditional and digital work that I love!

     There are so many ways to do things.  Some artists do use just Photoshop to ink and color, some use just Sketchbook Pro to ink and color and some may use a different program altogether.  There are so many different ways to do things so if you’re interested in getting into working digitally, I recommend downloading the free 30 day trials of different programs and seeing which ones you feel work well for you and your art!  All these programs do have a bit of a learning curve.  Photoshop and Illustrator can take a some time and practice to get comfortable with, but Sketchbook pro was pretty easy to pick up right off the bat.

       I want to thank Stasia-Chan for asking me to guest blog on her blog.  I’ve really enjoyed writing this post.  I hope you enjoyed reading about some of the many tools out there for creating digitally.  Check out these posts on my website if you want to know more about Sketchbook Pro, Adobe Photoshop and Illustrator, and Wacom Graphics Tablets and be sure to visit Adobe, Autodesk and Wacom's websites for more information as well.  If you would like to know more about me or my work, you can find me at my Website, Facebook Page, and Instagram Page!
-Robyn

Wednesday, April 15, 2015

Just a Catch Up Post

Hey guys. I am not very good at this blogging thing. I just can't seem to find the time to write out what I want to say. I have a lot of ideas, I'm just not good at getting them down on paper and then typing them down here.

Anyway, taking a small break from the Art Materials posts to let you know that I'll be having an artist friend share her post about digital art supplies as the next segment. I don't know anything about that side of art supplies, so I asked my friend Robyn if she would host a session for this blog, and she said yes! You can look forward to seeing that post soon, and I will link her own blog and website when I do, so please make sure you will be giving her blog a follow as well! ;-)

To be honest, I've been in a bit of an art slump as of late. I think a lot of it has just been being really busy, with no signs of slowing down soon on this end, and so I have other things I have to put before art most days. It's frustrating, but it's art, and there are just days where as much as I you want to be drawing away all day, it just can't happen. I'm also a bit frustrated because I feel like I'm not really sure what direction I'm taking this in. I'm nowhere near ready for my goal to pursue a manga yet, but I'm not sure how to get going putting together an illustration book, or even a children's book. There's a lot involved that I just don't understand, no matter how much I research and look into something like that. I don't like feeling like my art is just dead weight, kinda without a purpose. And so. Anyway, that's where I'm at right now, and it's just slowing up the art process, but, it'll get moving again. It always does.

A couple of weeks ago, I doodled an 80's inspired girl. I had such a fun time with her, playing with bright colors and etc.
This first one just came out really nice, the pose, the colors, it just all seems to go together really well. I did another one last week, and I'm not as happy with this one as I am with the first one.


Now that I look at it more, I think her pose is kind of awkward, and not as natural as the first girls pose. But I like her Rainbow Brite inspired hair! Anyway, I might try to do one of these every week for now. I have some reference pictures on my tablet that I downloaded of some rad 80's fashions. And it's fun laying out a really bright color scheme!!   I think the loud colors really play well on these characters.

I guess this is all for now. Just wanted to let you all know what's up, and please check back sometime next week for Robyn's post on digital art supplies!!! 

-Stasia-Chan '15

Sunday, March 29, 2015

Art Materials Part 1

When I first started drawing cartoons, I was doing a very sloppy job. 

I would draw them with a smudgy pencil or blotchy gel pens. A lot of my first doodles were VERY smeared by the end of the drawing!!  But as I kept at it and got better, I wanted to move on to some better quality materials and supplies. 

In this session, we'll talk about pens and pencils. 


-PENCILS- 

Really, when it comes to your art supplies, the pencil is your most important, most portable tool. From concept sketches, rough drafts, to that finished sketch, your pencil is the tool allowing you to bring that creativity to life. So sharpen. Erase. Repeat. 

-Good Old Number 2's  

Your best friend in school. Your best friend in art. Oh, the irony!!

Yep.. the good ol', regular #2 pencil. It's also the tool that most future artists start doodling with on their homework, much to the dismay of their teachers. It's how I started.. drawing little cartoon bugs on my school work. And it's the pencil that I still use the most for sketching today. They're cheap, they're comfortable to use, and, if you're a nerd like me, you can get them in cool designs. I personally have a stash of Avengers #2 pencils stored away, like nuts for the winter...

- Sketching Pencils-

When I first seriously started drawing, my parents bought me a set of General's Sketching and Charcoal pencils for Christmas one year. At the time, I didn't really appreciate them like I could have.. I did attempt some drawings with the charcoal pencils, but was dismayed by how smudgy they made everything I drew look. Kudos to artists that can do AMAZING works with charcoal!!

Now that I've been drawing a long time, I can appreciate more what a pencil does for me, and I appreciate sketch pencils more. You can pick up a set of sketching pencils at any arts and crafts store, or Walmart, and online. I've personally used the "General's" brand, and a friend bought me a set of "Dahler-Romney" sketch pencils from Walmart. Sketch pencil sets come with different sized pencils that give you lines of various width and shade. Some sketch pencil sets have pencils made with lighter and heavier lead, so you can change up the tone if you're working heavily in pencil when it comes to shading/lighting.  The set that I have from Walmart (Dahler-Romney) are more triangular in shape, rather than being completely round like school pencils.

If you're sketching a lot with pencil already, sketch pencils are worth a try, and pretty inexpensive to purchase a basic set. You might find yourself liking a certain pencil more after you've tried it!

*NOTE* As I said, some sketch sets include charcoal pencils. After my first attempt, I decided they just weren't a medium I was interested in using. But that doesn't mean you won't like them, so if you buy a set that has them, try them out!!


-Mechanical Pencils-

These seem to be the type of pencil that most manga artists prefer. Most mechanical pencils clip right to your sketchbook, so they're very easy to take with you, and being able to refill the lead on a pencil you're comfortable with is a definite plus!!

I've had cheap mechanical pencils that were OK, as long as you weren't pressing too hard (because the lead would snap), but mt favorite is the Sakura 0.7 mechanical pencil. It's great for sketching details because it has such a fine point! The only reason I don't use this pencil all the time, really, is the lack of an eraser. I just like having my eraser right there at all times, which is personal preference. With this exception though, most mechanical pencils do have a small eraser on them.


-PENS-

A lot of my early art never got to see the light of day. Why? Because I absolutely ruined them when it came to the inking!  

Inking is an important thing to know in cartoon/manga art. My pens are my favorite tool. While the pencil brings your vision to life, your pen brings out all the details, making it bold and eye catching. I LOVE having the chance to just use pen only on projects!!

So here comes my advice on pens: Take your time learning to ink!!!  If you're rushing, or not really paying attention to your original pencil lines (this happened a lot when I first started), you can smudge the ink, or make a mistake that can be obvious and pretty hard to fix. Play around with new pens first, testing the flow and tip. Some pens tend to dry out fast, or need more pressure to release ink, which can make your work look like connect the dots; thin lines in some places, blobs of ink on others. Always test your pens before you start inking a major project!!!

-Ballpoint Pens-

This is what I used when I first started doodling seriously. And, why not? Ballpoint pens are easily accessible. Most houses have a drawer with misc. ballpoint pens tossed in. I started noticing, though, how easily my drawings became blotched and smudged, because the ink would just blob out in places. Some artists can seriously doodle or draw awesome pictures just using ballpoints. Sadly, I am not one of them!! Occasionally when I use them, I prefer Pentel or Zebra brand. The nicer Zebra pens have a fine point and the ink flows out thinner. You could do an entire sketch with just a black ballpoint pen, or play around with some colored ballpoints, and find what works for you!


-Gel Pens-

I only have one Gel Pen that I use for line work, and it's a Rollerball brand. It gives awesome, bold, thick lines. However: I found out that hard way that the ink doesn't hold up with my Copic/Prismacolor markers, or with watercolors. The ink bled, because it wasn't water soluble. I only use this pen for line work if I know I will be finishing the project with colored pencils.

I also have a few Sakura Jelly Roll pens, and I have never been more impressed with a gel pen! They make an awesome white gel pen that manga artists love for highlights on hair, and doodling on colored paper. I also have a glittery blue one that's great for adding sparkle details. The Jelly Roll pens come in all different colors... pastels, brights, neons, and metallics, to name a few.. and can be purchased at most arts and crafts stores and online!

-Sharpie Pen-

This is the first "felt tip" pen I worked with, and I really got a feel for nice inking once I started using this pen!

These pens are available in different sizes, and they make colored ones now as well. I definitely recommend this as a beginners pen, if you're wanting to improve your inking skills, this is the pen for you. They have a really nice, even flow, and don't dry out fast. These pens can easily be purchased at Walmart, stores like Staples or Office Max, and are pretty inexpensive for a set of two pens.

-Loew-Cornell-

This is a brand I discovered carried by Jo-Ann Fabrics. I buy this set of four pens for $5. I have had about three or four sets of them now. Now, they sound cheap, but they are actually really great inking pens! They come in four different nib sizes.. 01, 03, 05, and 08. I like having the variety of different widths to work with.

My only beef with these pens, is that I can't use them with watercolors. They will bleed. They hold up very nicely with my marker media and colored pencils though, so it hasn't been a major issue for me.


-Sakura Manga Pens-

I'm torn on these ones...

For one thing, they are pretty pricey. $20 for four pens and a mechanical pencil (which I mentioned earlier), so it's not something I would run out to buy every few weeks. The first set I had was great. The pen sizes are .01, .03, .06, and 10. The .06 and 10 sizes are more like a marker, really thick brush tips.  This was my first time playing with different nib sizes. It took me awhile before they were drying out, but when I purchased my second set, I was severely disappointed. They were already pretty much dried out after two or three drawings with them. I didn't get as many things inked with that set, which was frustrating, because they are expensive. Maybe I just got a bad set, but I haven't bought anymore since. I switched to the Loew-Cornell set, since it was less expensive and honestly, nicer quality. However, if every set of the Sakura Manga Pens worked as great as that first set I purchased, they'd be awesome pens. I was just skeptical when it came to spending the money on what could be another, potentially, bad set.

-Sakura Micron-

I love this pen. By far, this is my favorite pen ever, and I couldn't possibly recommend it enough. The great thing about these pens is that they hold up with every media you throw at it, from colored pencils, to markers, to watercolors. You can get them in various nib sizes and colors too! In our small town, our local Gospel Bookstore carries them individually because they hold up well in Bibles. But Joann Fabrics also has sets of 3, 5, and 10 pens. The sets  are definitely pricey, but these pens are worth splurging on. I like mine so much, that I burn through them pretty quickly!!  This pen would be a great step up from the Sharpie pen... it's similar, but nicer quality.

-Faber Castell-

I recently purchased one of these drawing pens after seeing several artists I follow on instagram using them. I. Am. In. LOVE. My second favorite pen at the moment, I have been using it to ink everything!! I bought one for $5 at Joann Fabrics, but they are available at other arts and crafts stores, and online. Again, these come in various nib sizes and sets. What I enjoy about this pen is the ink flow. It's just a comfortable, great quality pen to use!!


This covers my thoughts on pencils and pens for the moment, just because these are the items I have personally used, or am still using. There are plenty of others out there that I haven't used, but would like to. The Copic Multiliner comes to mind, because I enjoy their marker quality and from asking other artists, it seems like the multiliners are just as good quality wise. But, I would want to try them myself before forming an opinion. As I've said before, you've just got to try new materials to best decide what is going to work for you. But I hope that I've given you some ideas on new things to look into and experiment with. I'm sure you'll create some amazing thigns!!  


-Stasia-Chan 


Friday, February 27, 2015

When It Comes to Materials

*NOTE*   This post will be two, possibly three, posts long. There's just so much I want to talk about and compare, and to fit it all in one blog posting would just be pushing the limit. I will do my best to update the next post quickly!!  


Yesterday, I was so blessed to do my third Manga Drawing Session for the Teen Anime Club at our local library.  I LOVE doing this. Since manga is really where my artistic passion lies, I have such a blast getting to share my passion with other young people that are interested in the same type of art! We had a great time, and a great turn out!  The title for this session was "From Head to Torso"  (and I will do my best to squeeze in a blog post about drawing manga bodies soon!), and it was fun to show them my method of drawing manga bodies and poses, and seeing what they drew.  After the class was over, I had several young ladies come up to me afterwards and ask about some of the different materials I use, buy, and would recommend. And since I love answering questions like this (and there's SO much to discuss when it comes to this subject), it inspired this blog posting. Hopefully, if you're reading this, it will be a help to you as well. And I'd love to hear your questions or thoughts on art materials as well!! 

So, you're getting pretty good at this art stuff. Good enough, that maybe you're looking into purchasing some new various art materials, or looking into upgrading to nicer materials than you're using now. My advice:  Wait a minute. Slow down. There are a few things to keep in mind! And, hundreds of opinions for every product that you're looking at, why you should.. or, should not.. use it.

By all means, research before you buy. But remember, that reading every negative/positive opinion on the product still won't make up your mind for you. That's just someone else's input. When it comes to art supplies, only you can figure out what's going to work for you. Only you are going to be able to figure out what you're comfortable working with!

So, why are you thinking of buying some new supplies? Because you've really been practicing with the old ones and have improved so you feel ready to try something more professional? Or you just feel the need to spice up your art by trying something new? Or maybe you've got birthday and allowance money stashed away and have decided that investing in new art supplies is the way to spend it?  All of these are good reasons for looking into better quality products.

But, here is a really important thing to keep in mind: All the fancy art supplies in the world will not make you a better artist. I cannot stress this enough, because I see so many artists that think this is how it works! Nope. A lot of young artists completely miss this fact. I follow a lot of  beginner artists on instagram that save up money and rush out to blow it on Copic Markers, thinking that these will completely improve their art, when they could spend a little more time learning how to nicely ink a piece, or work on body proportions. This is just an example. Nicer art supplies will not automatically make your work better. But, nicer materials will give you the incentive to become better. Think of it as leveling up; you've become so good with your old tools, that you're ready to try mastering a few new ones! 

Also, don't overload yourself with new tools. It's best to start with a few here and there, until you get the hang of how they work and if you can make it work for your style of art of not. So, don't rush out and buy the Copic markers, watercolors, and expensive drawing pens in one trip, come home, and expect to know how to use them all the first try.  It's better to try out new tools gradually. When you focus on one at a time, rather than three at a time, you'll become more comfortable and better equipped at using it!

So, those are just some things to keep in mind about purchasing new art materials. In the next post, I will start a break down of different (traditional) materials that I use, have used in the past, and what I like and don't like. I will give you my honest opinion of each item, but again, only you are going to be able to decide what will work best for you and your art!!  

What advice would you give to someone looking into new art supplies?

-Stasia- Chan

Tuesday, February 17, 2015

Kawaii Scribbles


This past weekend was very busy for us, as my husband and I celebrated our fifth anniversary on Valentine's Day.  =-)  Since I'm on the subject, I'd like to throw out there that I greatly appreciate having a husband that supports my artistic hobbies 100%, who has taken time to help me set up for the community art walk, runs me around for art supplies, and doesn't mind giving me the occasional afternoon to myself somewhere so that I can sketch and he takes care of our three year old daughter. I'm so blessed and thankful to have someone that supports and encourages me like that!!  ^^

Since the weekend was very busy, I didn't have a lot of time to focus on art. But Sunday night, I took some time to sketch out an idea I had inspired by breakfast foods (the picture you see on the top). If I have to title this one, then I'm calling it "Vocaloid Breakfast", since I decided to draw a kawaii chibi Hatsune Miku.  ^^ This sketch was done in one of my Fabriano sketchbooks ( I LOVE their sketchbooks, and I will be sure to talk about them some more in another post!), colored with Copic, Prismacolor Premier, and Spectrum Noir markers. I especially like the watercolor feel of the floor, I used two colors to give it a sort of "wash" feel that I really like. Actually, I really like this whole drawing, and looking at it just makes me hungry for breakfast foods!!  O_o

Since I liked the first idea so well, I decided I'd like to draw another one featuring donuts and a kawaii chibi Usagi Tsukino. I sketched the idea out while I was waiting on laundry to come out of the dryer, and inked and colored it last night using the same tools as I had in the "Vocaloid Breakfast" drawing.   At first, I wasn't really pleased with the colors I blended for the donuts.. I still think I should have tested different blends of markers more diligently before hand.. But, I don't think they look so bad now that I see the finished colors all together.

While I would love to focus more on actual manga pieces, some days my busy schedule just doesn't allow the time to do something that extensive. If there's one thing that I've learned in the last several years of manga, it's that it takes time to do it properly and to turn out something really nice that you can be proud of.  I'm a busy stay - at - home mom to a three year old, so some days, well.. they just don't go the way you plan them out. On days like this, I'm glad that I can focus on something smaller scaled, which the kawaii style allows me to do!  And, what's great about this style is, it's STILL manga art!!  Yep!  Kawaii is just another form of chibi art in the manga world. In the last few years, kawaii art has exploded!! 

I learned about the Kawaii style through this book that I am showing you below.. You can find it on just about any book seller site, and on amazon. This book by Chris Hart not only goes through the basics of the Kawaii style, but also gives you some tips on the Moe style, which is another type of kawaii art, mostly focused on sweet, lolita styled girls. I totally recommend this books!!  But, even if you are looking at books written and drawn by other great artists, never be afraid to find your own style. You definitely don't want to lean on one certain way of drawing for the rest of your life, or only follow one artist's style. You've got to take all those elements and turn it into something that's totally yours!!!  =-) 

What sort of kawaii things are you finding time to create?  =-)

-Stasia -Chan


Thursday, February 12, 2015

Welcome!

Hello!!   Welcome to my blog! Thanks for stopping by!  ^^

My name is Anastasia Merritt. I am a stay at home wife and mother of one, but I also love to draw and art!!  ^^  My passion lies in manga style art, but I love the kawaii art style and cartooning as well. My methods in art are traditional, meaning, I'm old school and still push a pencil around paper to achieve what I hope is something that looks nice to you.  ;-)

I have been wanting to start a blog for some time now, it was just a matter of finding the time to do so.  With this blog, I hope to share with you some of my own methods and helps in the kind of art that I do, as well as some of my recent works and ways to stay in touch with me, if by some chance, this blog fails to be updated as often as I hope to...   ^^;

Once this is a bit more established, I also hope to have some of my artist friends host or share a blog post with me on this page!  I see lots of more professional type artists do this.. i.e., painters, photographers, etc.. but I've never personally seen such from manga/cartoon artists such as myself. And so this is something I'm excited about doing in the future!!  

I hope to update here about every other week, but I will plan to do a more detailed blog posting this weekend, since this is just my "welcome" post.  =-) 

Hope you will keep in touch through my posts!!!  Have a creative day!!  ^^